About two-and-a-half years ago I first set eyes on this Triumph… well, not so much an actual Triumph, but more a loosely assembled frame-cum-basket case, freshly imported from Colorado.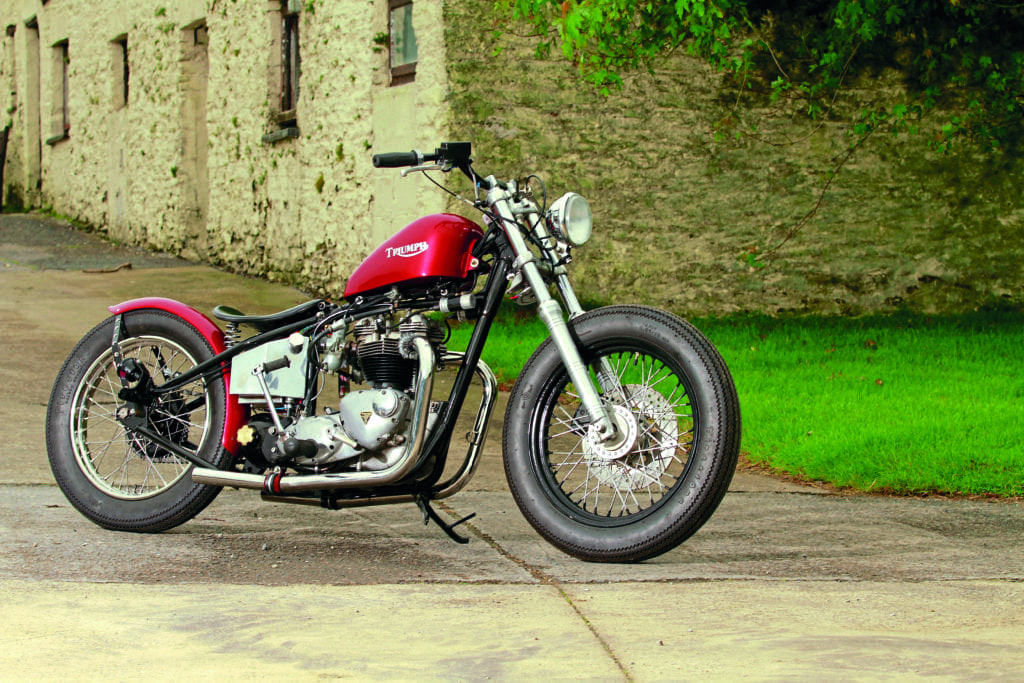
Words: Matt Williams
Pics: Garry Stuart
Then, some 18 months ago, I was told it was for sale through word of mouth and, despite having never built a bike before, but had always wanted to, decided to take the plunge. I bought it, and sold off a few older bikes that I’d got knocking about because… well, a clear workspace makes for a clearer mind. I’m a welder/fabricator and machinist by trade, so I didn’t anticipate anything giving me too much trouble. The main idea for the bike, which inspired the name it now bears, was that because it was to be built in my workshop in an old (18th century) coach house on a rural Welsh farm, it was to be a backyard bobber.
Enjoy more Back Street Heroes Magazine reading every month.
Click here to subscribe & save.
What I’d bought was, as I said, a basket case Triumph; a 1968 Triumph Bonneville T120R 650, to be precise. The engine was all there, and the frame’d been fitted with a bolt-on hardtail, there was a front end of sorts, a rear wheel, and a few other bits, but it’d still need a fair amount of work to get it up and into a running bike. 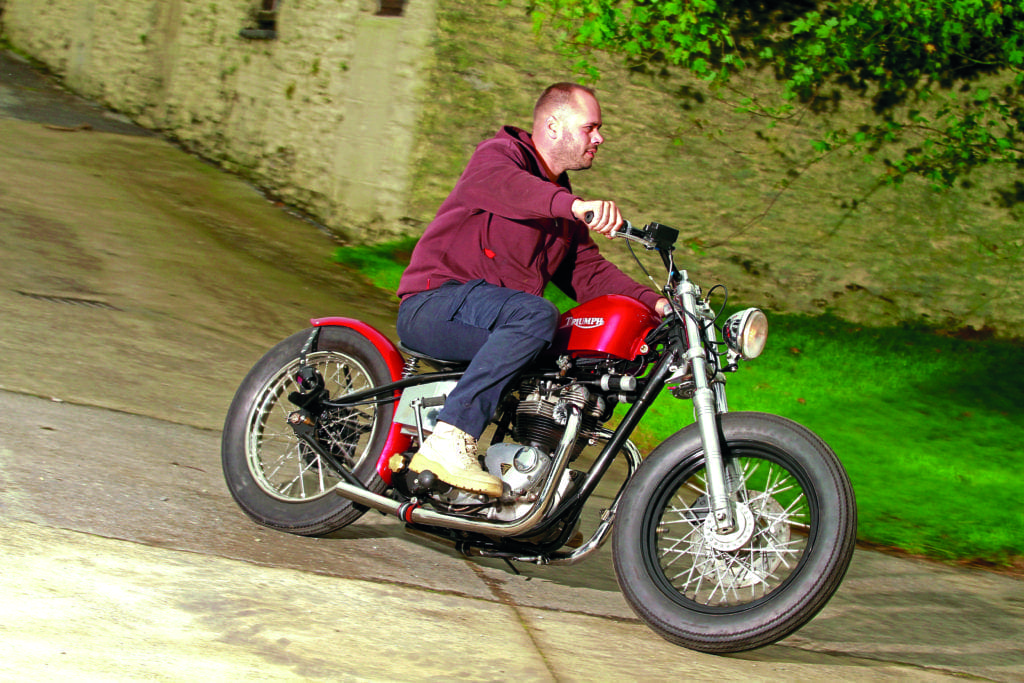
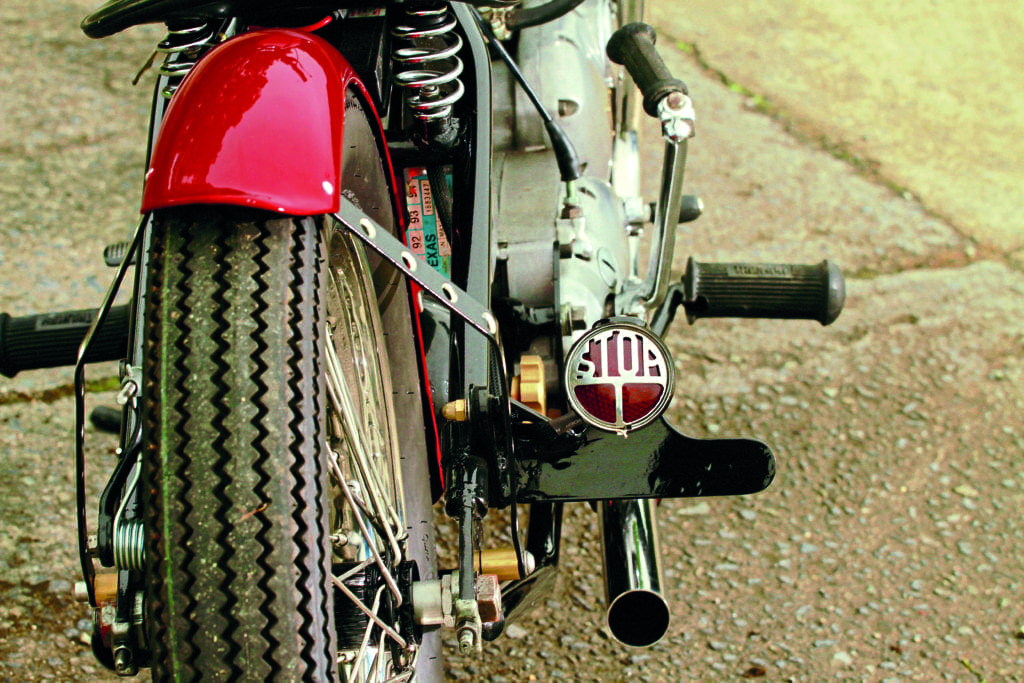
The first few weeks were spent trying out different ideas, and looking at how to overcome problems, and finding parts for different options. I bought a tank, a two-gallon Sportster one, from eBay, as well as an oil tank, an old fire extinguisher, a Bates-style headlight, and a few other choice parts too and, with these in hand, set about modifying the frame where needed to take the new tank, and fabricated new brackets to hold the fire extinguisher which was to become a holder for the electronics box (more on that in a mo’). I also made up new mounts for the oil tank, which now incorporates the battery tray, and the sprung seat, from West Eagle (www.west-eagle.com) in the US, and its springs. The frame was then shot-blasted and smoothed where needed, before been prepped and sprayed in a metallic diamond black with a light gold flake to break up the black.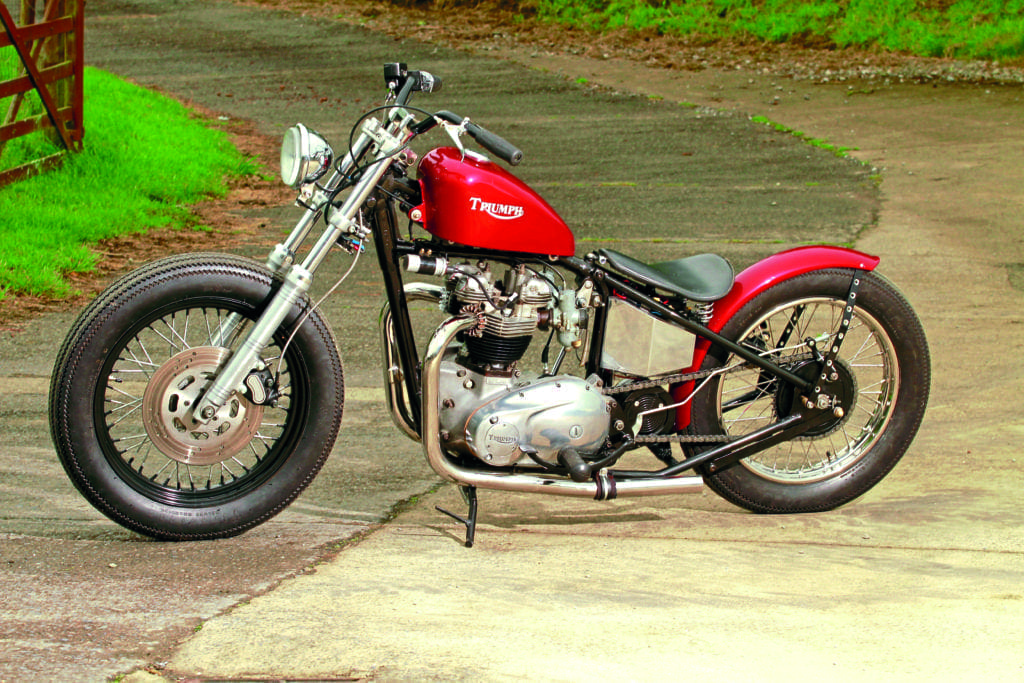
By this time I’d decided that a newer Harley front end’d suit the project well, and give me a useful disc brake and four-pot caliper too – despite being more powerful than the single-leading-shoe (SLS) fitted to the pre-’68 Bonnies, the eight-inch twin-leading-shoe (TLS) front brake that the bike came with wasn’t really up to the job of dealing with 21st century traffic. I bought a set of forks and yokes from a 2004 883 Sportster, and the forks were stripped, cleaned, shaved and had slight undercuts machined into the fork legs before they were painted and reassembled. A 19-inch Harley wheel was sourced, but it wasn’t as straightforward a fit as I’d hoped it’d be – I had to machine all the necessary spacers, including one to offset the disc to match the caliper, and others to match the wheel to the forks, but that’s all part of the fun – I get a lot of enjoyment overcoming fitment issues and any other problems that incurred during the build.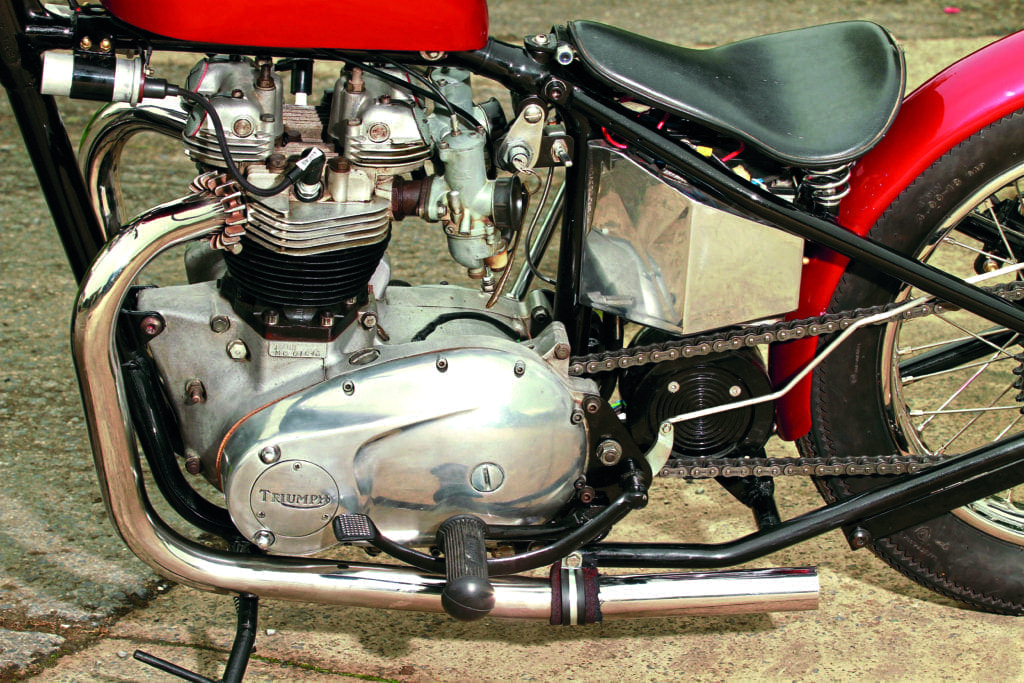
The fuel tank was then modified by blanking off the rear tunnel so that it’d sit parallel to the frame – this needed doing as the angle of the frame was different to that at which the tank was designed to sit. This dome, the tank and the rear mudguard (a Bonnie front one modified to work as a rear, just as they used to do back in the day) were then sent off to my friend Andrew for paint – Renault Kadjar red over a silver base, if you’re interested.
While this was being done, I started looking into off-setting the stock Triumph rear wheel to clear the bolt-on hardtail. Yes, I know others may’ve cut the frame to suit the wheel, but I didn’t want to do that so, once I’d taken all the measurements, it was off to SRM Engineering, the famous BSA, Norton and Triumph specialists in Aberystwyth, who built the wheel to my spec using an 18-inch stainless rim and stainless spokes.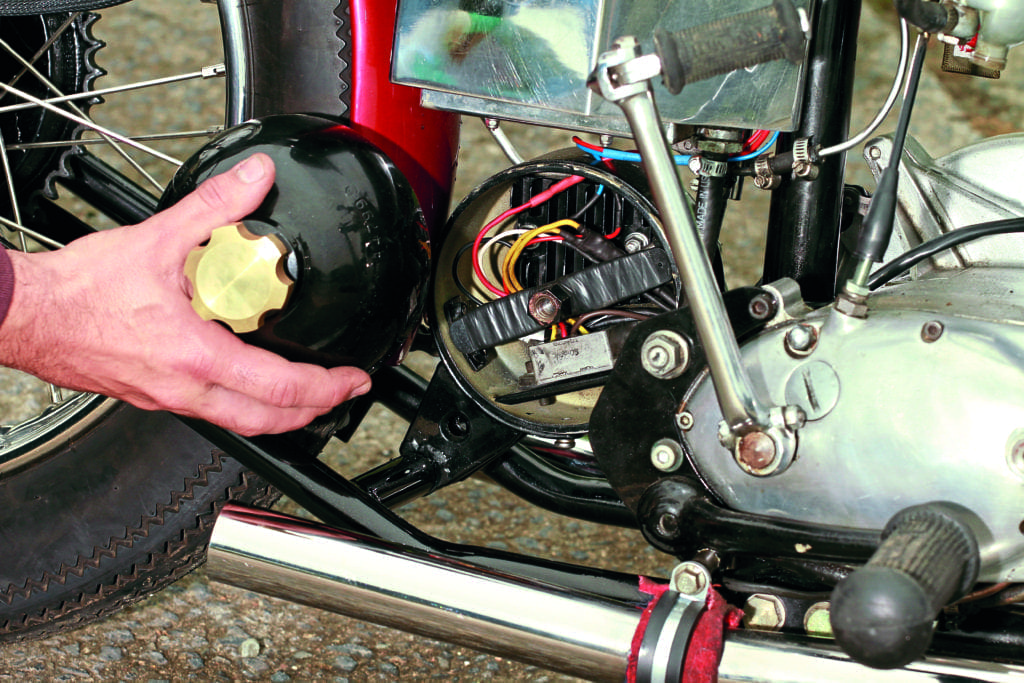
Once the bike was rolling, things soon started taking shape. The tank and mudguard were put on, and I finished tucking away and out of sight as much of the wiring loom, made by me for the first time ever, as possible, mounting the hi/low beam switch opposite on the battery box/oil tank to keep the ’bars looking clutter-free. I used a Sparx electronic ignition kit (from www.tri-corengland.com), rather than the traditional points, and it works perfectly – the bike starts easily every time.
Since these photos were taken last year, the Triumph is now UK-registered on an age-related ’plate and ready to use. I use it mainly for rides around the coastline of the very picturesque Cardigan Bay (if you’ve never been there, go, it’s amazing) on a summer’s evening, stopping off at a local bike meet for the usual munch and drinks, something that a lot of folk do, but my bike’s very different from the vast majority of the others in the area – exactly as I planned.