A while ago I discovered The Trip Out, which transported me right back to the ’70s – it was totally awesome, and I left there influenced and with all kinds of unfeasible plans.
Word and pics: Layla Leatham
I’ve always loved British bikes, especially choppers, and so I impatiently collected bits to build the image that exists in my mind’s eye, all very British, late ’70s and trippy.
Enjoy more Back Street Heroes Magazine reading every month.
Click here to subscribe & save.
So where did a Suzuki come into it? Well, it didn’t until a friend offered it to me, in bits, as a swap for a guitar. I only saw it as a base to practise all the things I’d need to be good at by the time I’d accumulated enough bits for my proper build – just a quick rough build, a prototype kind of thing, shouldn’t even cost much, right? Wrong! It took over my life for six months with hardly a day off – I started just after Christmas 2017 and, after much obsessing, it was complete and on the road by mid-June last year.
In order to get the look right I rigged it all up on the floor, balanced on blocks of wood or hung from the ceiling, then took coordinate measurements to reproduce in my jig. Not digging heavy steering I also drew those measurements using CAD, just enough to figure out what rake I needed in the yokes to get the trail right. I made the yokes with a six-degree rake which, with forks at 45 degrees and a trail of 100mm, resulted in offsets that looked about right. It was a lot of messing about with tooling and fixtures to incorporate the angle, and two different offsets (no CNC here), but it was well worth it – the bike rides lovely, steers fairly lightly, hardly flops and has a reasonable turning circle. Most importantly for me though, the yokes avoid that monolithic billet look.
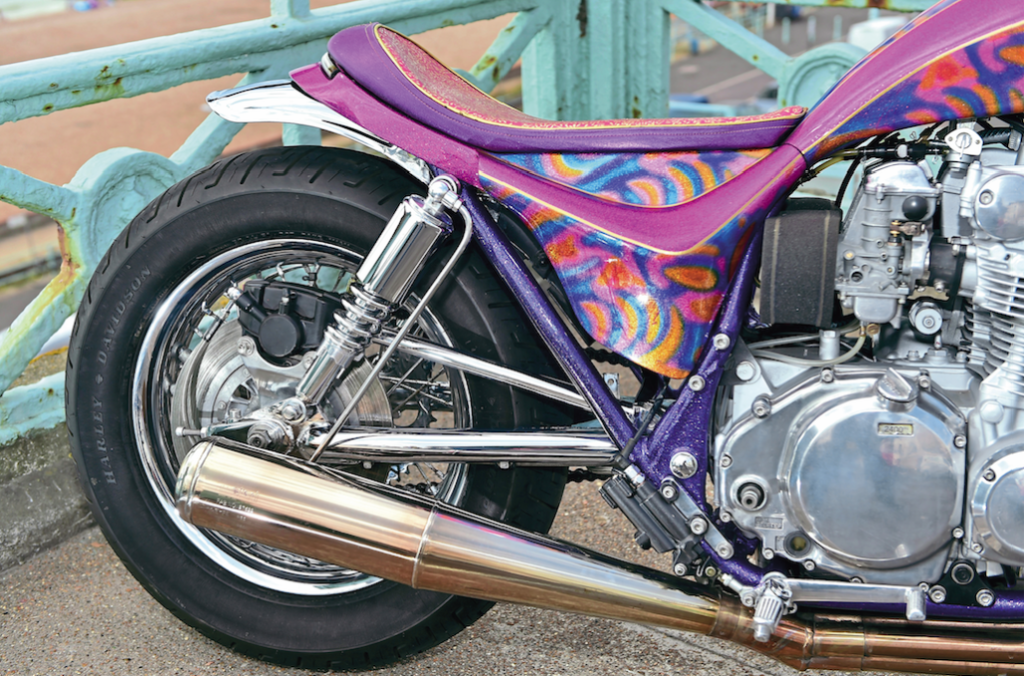
I’m totally done with hardtail discomfort so, at the other end, I used two swinging arms, split and rejoined to make a wider one for the fatter back wheel. I used the bed of the miller and made some fixtures to keep it all flat while I welded it. Keeping the cradle and headstock I made the rest of the frame; it’s lowered, goose-necked and raked according to the coordinates I’d measured earlier for the look I wanted – it didn’t twang when I took it out of the jig, and letting go of the ’bars it rides dead straight, leaning into bends cooperatively, so I’m pleased with that.
I already had a replica Triumph Hurricane fibreglass body so I got several more made from it for future projects, and cut one into several pieces, improved its waviness and flow by extending the tank length and narrowing and shortening it around the seat. The reduced tail sections were reconnected into one unit by adding more resin and matting, and I made a flimsy jig to keep them in place by adding aluminium duck tape and clingfilm to the frame.
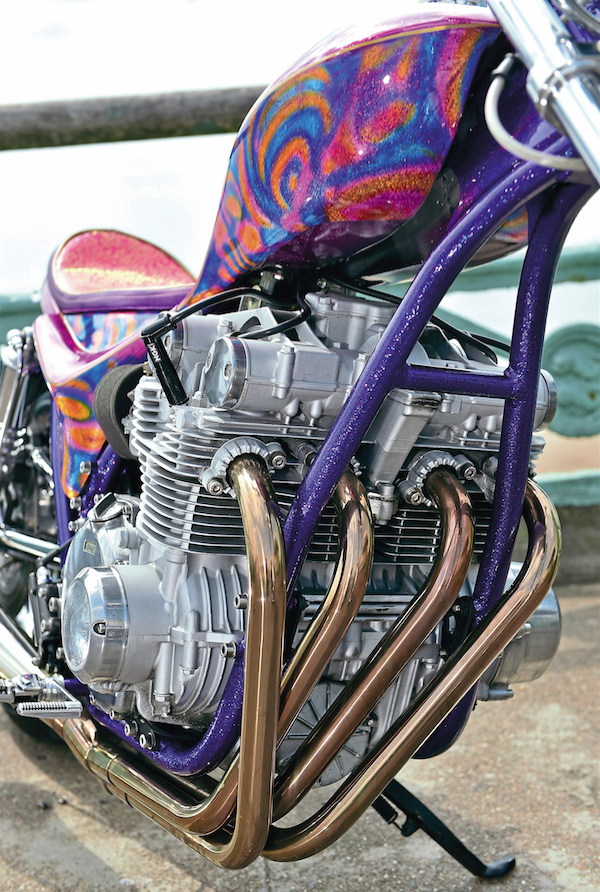
I used the fibreglass tank section as a mould to cast a concrete block into, then, cutting the mould down the centre, I used the concrete as a dolly to make a steel inner tank in the Hurricane shape to max out the fuel storage capacity. The tricky bit was to make everything good enough so that, with the tailpiece and the steel tank fitted in place on the frame, I’d only need a thin layer of fibreglass filler to dot and dab (like with plasterboard) the two fibreglass tank halves on to the steel tank such that the curvature will flow continuously into the tail when the missing few inches is filled in at the back of the tank.
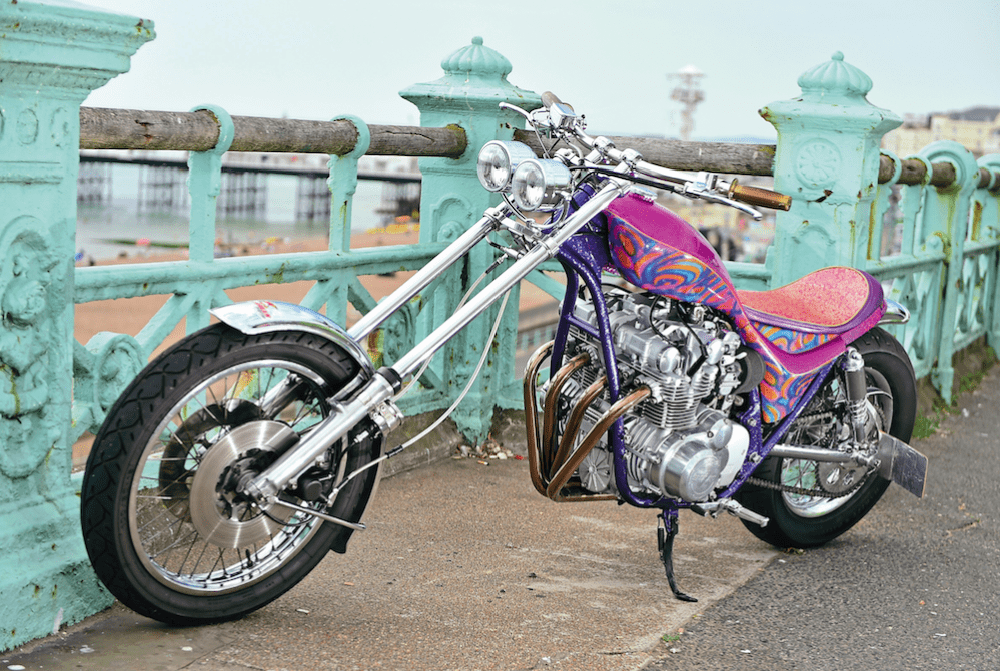
I made a few pairs of ’bars, but they either resembled a Dutch bicycle, or a goat (or were just stupid), so having run out of tube, I eventually compromised and bent these from a John Lewis stainless steel shower curtain rail which was just the right cross section, and I like how they help make the bike look like a deer leaping over a fence.
Everything else is just general bike building with bought-in aftermarket stuff or bracketry and spacers… well, apart from the gimbal headlamp mount – I was pondering how best to go about that when I noticed the gimbal on my make-up mirror and so it was solved. I’ve done everything possible myself, the four exceptions being chrome-plating, fibreglass copying, dyno tuning and leather stitching. It’s my first attempt at making yokes, frames and tanks, and using fibreglass, and I found myself making each bit better than the previous one, so it ended up as near to a production bike finish as I could get, which trebled the amount of work involved.
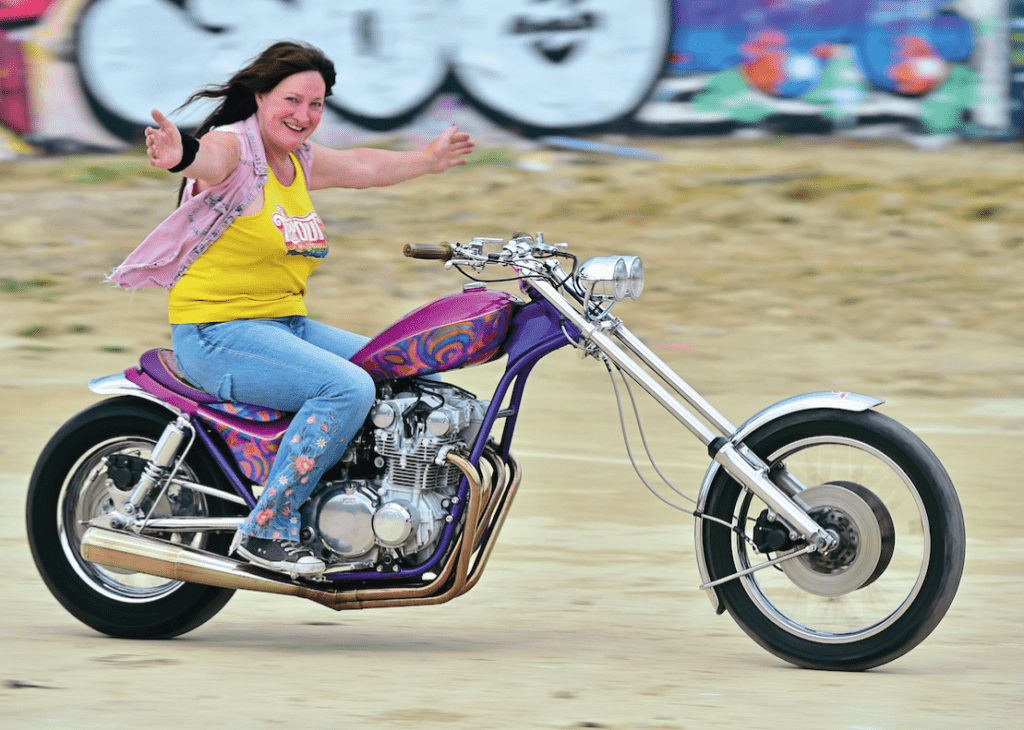
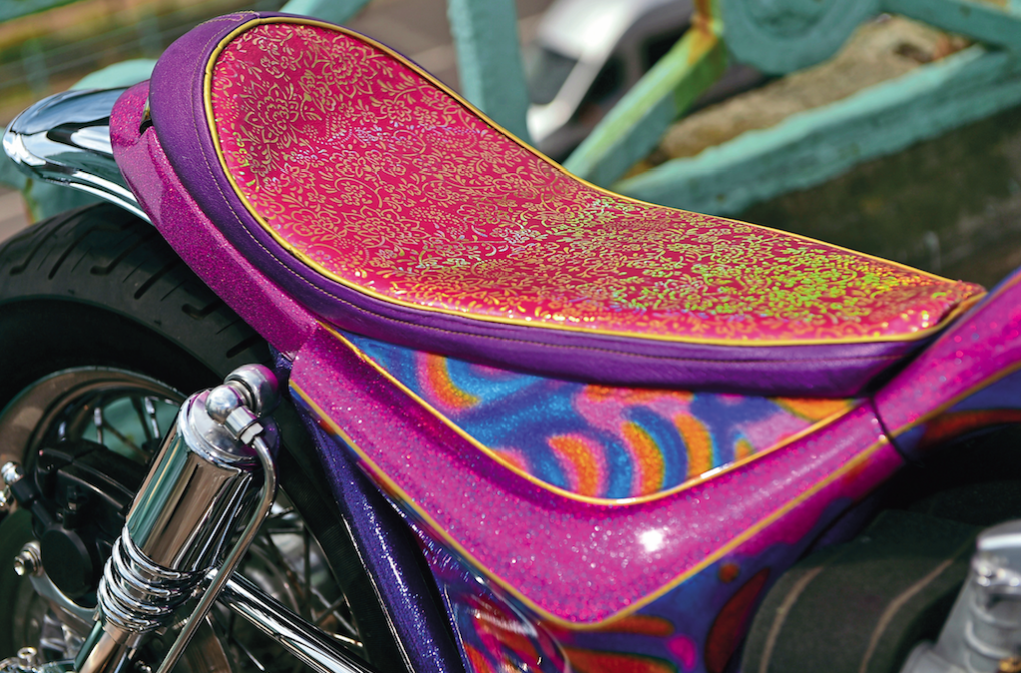
When it came to the paint, everybody and their dog begged me not to do it pink, but what do they know? I totally fell in love with a ’flake called Holographic Fuchsia so I ignored them; the mistake was introducing another ’flake called Blurple – in bottles they looked great together, but once sprayed they just fought each other for attention rather than complementing one another. I think I’ve rescued it though by introducing the lighter blue and orangey gold bits, and I was pleased that the paint’d wandered off in that direction as months previously I’d seen the most fantastic piece of pink leather with an iridescent gold paisley pattern embossed on it. I anxiously rushed back there and was amazed to find no one else had snapped it up…. fools! Bordered by gold piping, and with metallic purple sides, the seat blends in well and, with the LED rear light set below in the fibreglass, I like the coordinated look.
It’s been worth it, and I’m certainly in a better position for doing the ’70s trippy British build I’ve planned, but there doesn’t seem much point now as this Suzuki has it covered. It’s become a thing in its own right so I might start it one day, but for now I’m enjoying reliving the summer of ’76 with it in Brighton where anything goes.